
It's been slow here on the blog lately as I adjust to spending more time outside. Hopefully I find my groove soon and get back into a more regular schedule. Nap times have been sporadic and trying to do any blogging when my daughter is awake cuts my productivity in half. At least. So I've been missing out on a lot of blogs that I usually follow and I've been slow to reply to your comments. But I am still here! And with frozen yogurt as an apology.
You know how artificial fruit flavors taste like exaggerated distant cousins of the real thing? Pineapple and banana Laffy Taffy's come to mind... I usually think of blueberries as being pretty mild in flavor, even with wild-picked, which I'm lucky enough to fill my freezer with every year. Baking these blueberries exaggerates the flavor so much that it's almost shocking that there isn't any additional artificial flavoring to punch it up. Even diluting it with milk, yogurt, and heavy cream doesn't seem to lessen the intensity!
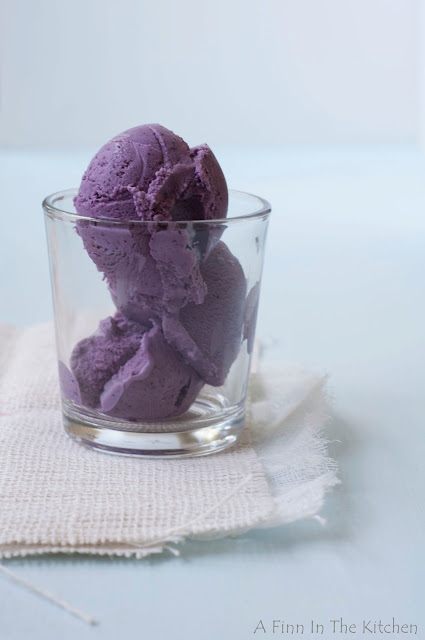
Think of this recipe as a lazy-summer-day-recipe because at least 6 hours before you start the frozen yogurt, you'll have to let the yogurt drain and thicken in the fridge. The incredible creaminess and thickness that happens in the end is worth all those extra painful hours.
Lately I've been going wild on Pinterest with sewing projects and staying up late into the night pinning projects that I can't even make right now because I don't have a sewing machine. I hinted to Nick the other day that I might want one, but I'm wondering if I really need another hobby right now...But whenever I feel overwhelmed and busy, I look at my mom and sister and realize that I've got time to spare! My mom raised 14 kids and my sister has 5 and a thriving business as well as honeybees (round two is hopefully more successful), giant garden, chicken, pigs, etc. Plus, how can you resist this, this, and these?
On top of that, my sister puts out a magazine which I've been lucky to contribute a recipe to. Everything she (and her contributors) do is stunning and I'm always humbled to be included. The recipe I shared there will be on the blog next! You can see the free preview of the mag at the end of this post.

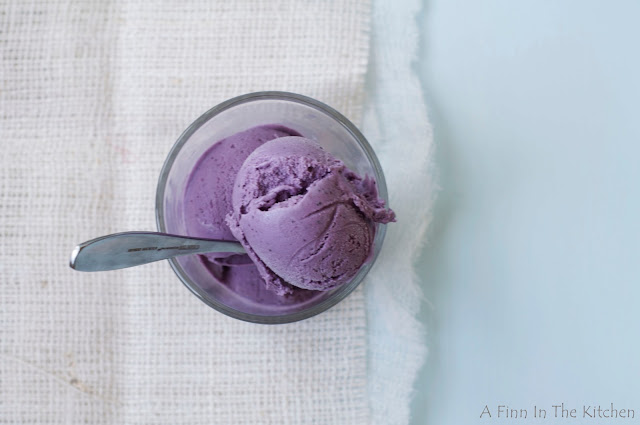
Blueberry Frozen Yogurt
Yield: about 1 quart
Adapted from Jeni's Splendid Ice Creams at Home (not an affiliate link)
frozen yogurt
1 quart plain whole-milk yogurt
1 1/2 cups whole milk
2 tablespoons cornstarch
2 ounces (4 tablespoons) cream cheese, softened
1/2 cup heavy cream
1/3 cup sugar
1/4 cup honey
fruit compote
1/2 pound (about 1 1/2 cups) fresh or frozen blueberries
1/4 cup sugar
Do ahead:
Line a strainer with two sheets of cheesecloth, set it over a bowl, and pour the yogurt over the cheesecloth. Cover with plastic wrap and allow to drain in the refrigerator for at least 6 hours. Remove 1 1/4 cups of yogurt for this recipe and refrigerate any remaining yogurt. Discard the liquid (whey) that gathers in the bowl or refrigerate in a jar and add to smoothies or use to ferment vegetables.
For the compote:
Preheat oven to 300 degrees F.
Stir the blueberries and 1/4 cup sugar together in an 8 x 8-inch baking dish. Bake for 40 minutes, stirring about every 10 minutes.
Puree fruit and any juices in a blender until smooth and remove 3/4 cups of puree, keeping the rest in an airtight container in the refrigerator for another use. (I like mine stirred into plain yogurt and topped with a handful of granola or poured over vanilla ice cream.)
In a small bowl, whisk 3 tablespoons of milk together with the cornstarch.
In a medium heat-proof bowl, whisk the softened cream cheese until smooth.
Place a large saucepan over medium-high heat and bring the remaining milk, heavy cream, 1/3 cup sugar, and honey to a boil while whisking frequently. Boil for 4 minutes and remove from heat. While whisking constantly, gradually add the cornstarch mixture to the hot milk and place back on medium-high heat. Return to a boil and allow to boil until slightly thickened (about 1 minute).
Pour the hot milk into the cream cheese bowl and whisk until no lumps of cream cheese remain. Whisk in the yogurt and blueberry puree.
Cover and refrigerate until cold. Check after an hour or two.
Process in your ice cream maker according to the manufacturer directions. I have the KitchenAid attachment and stir for about 25 minutes. It may not firm up as well as ice cream, but it will be just fine after a few hours in the freezer. Transfer to a freezer-safe container and freeze for at least 4 hours.
It should be soft enough to scoop straight out of the freezer. At least there's some instant gratification with this recipe!